Setting up a Pi-Hole
Before we get started, if you haven’t heard of the PiHole module. It’s an Open Source networking product that’s exploding in the consumer networking world. Let me begin by saying at my families house we have multiple TV’s (a smart TV and a TV with a Roku), the kids each have tablets, and my wife and I have our phones and laptops, as well as a few personal servers (local NAS and development servers). And for the majority of the time, most of these devices are sending and receiving traffic at any given time.
For several months in a row our households bandwidth peaked over our xfinity (Comcast) data cap. I mean $10/$20 extra every month doesn’t sound like much, but it adds up (especially when you have kids). So I started to monitoring our networks traffic a little more thoroughly, and it turns out a pretty sizeable amount of our throughput was from advertisements. I’m not going to deny watching Netflix, Hulu, Disney+, and YouTube doesn’t consume a ton of bandwidth; but our network was congested with a ton of traffic, that honestly we had no idea was even being used.
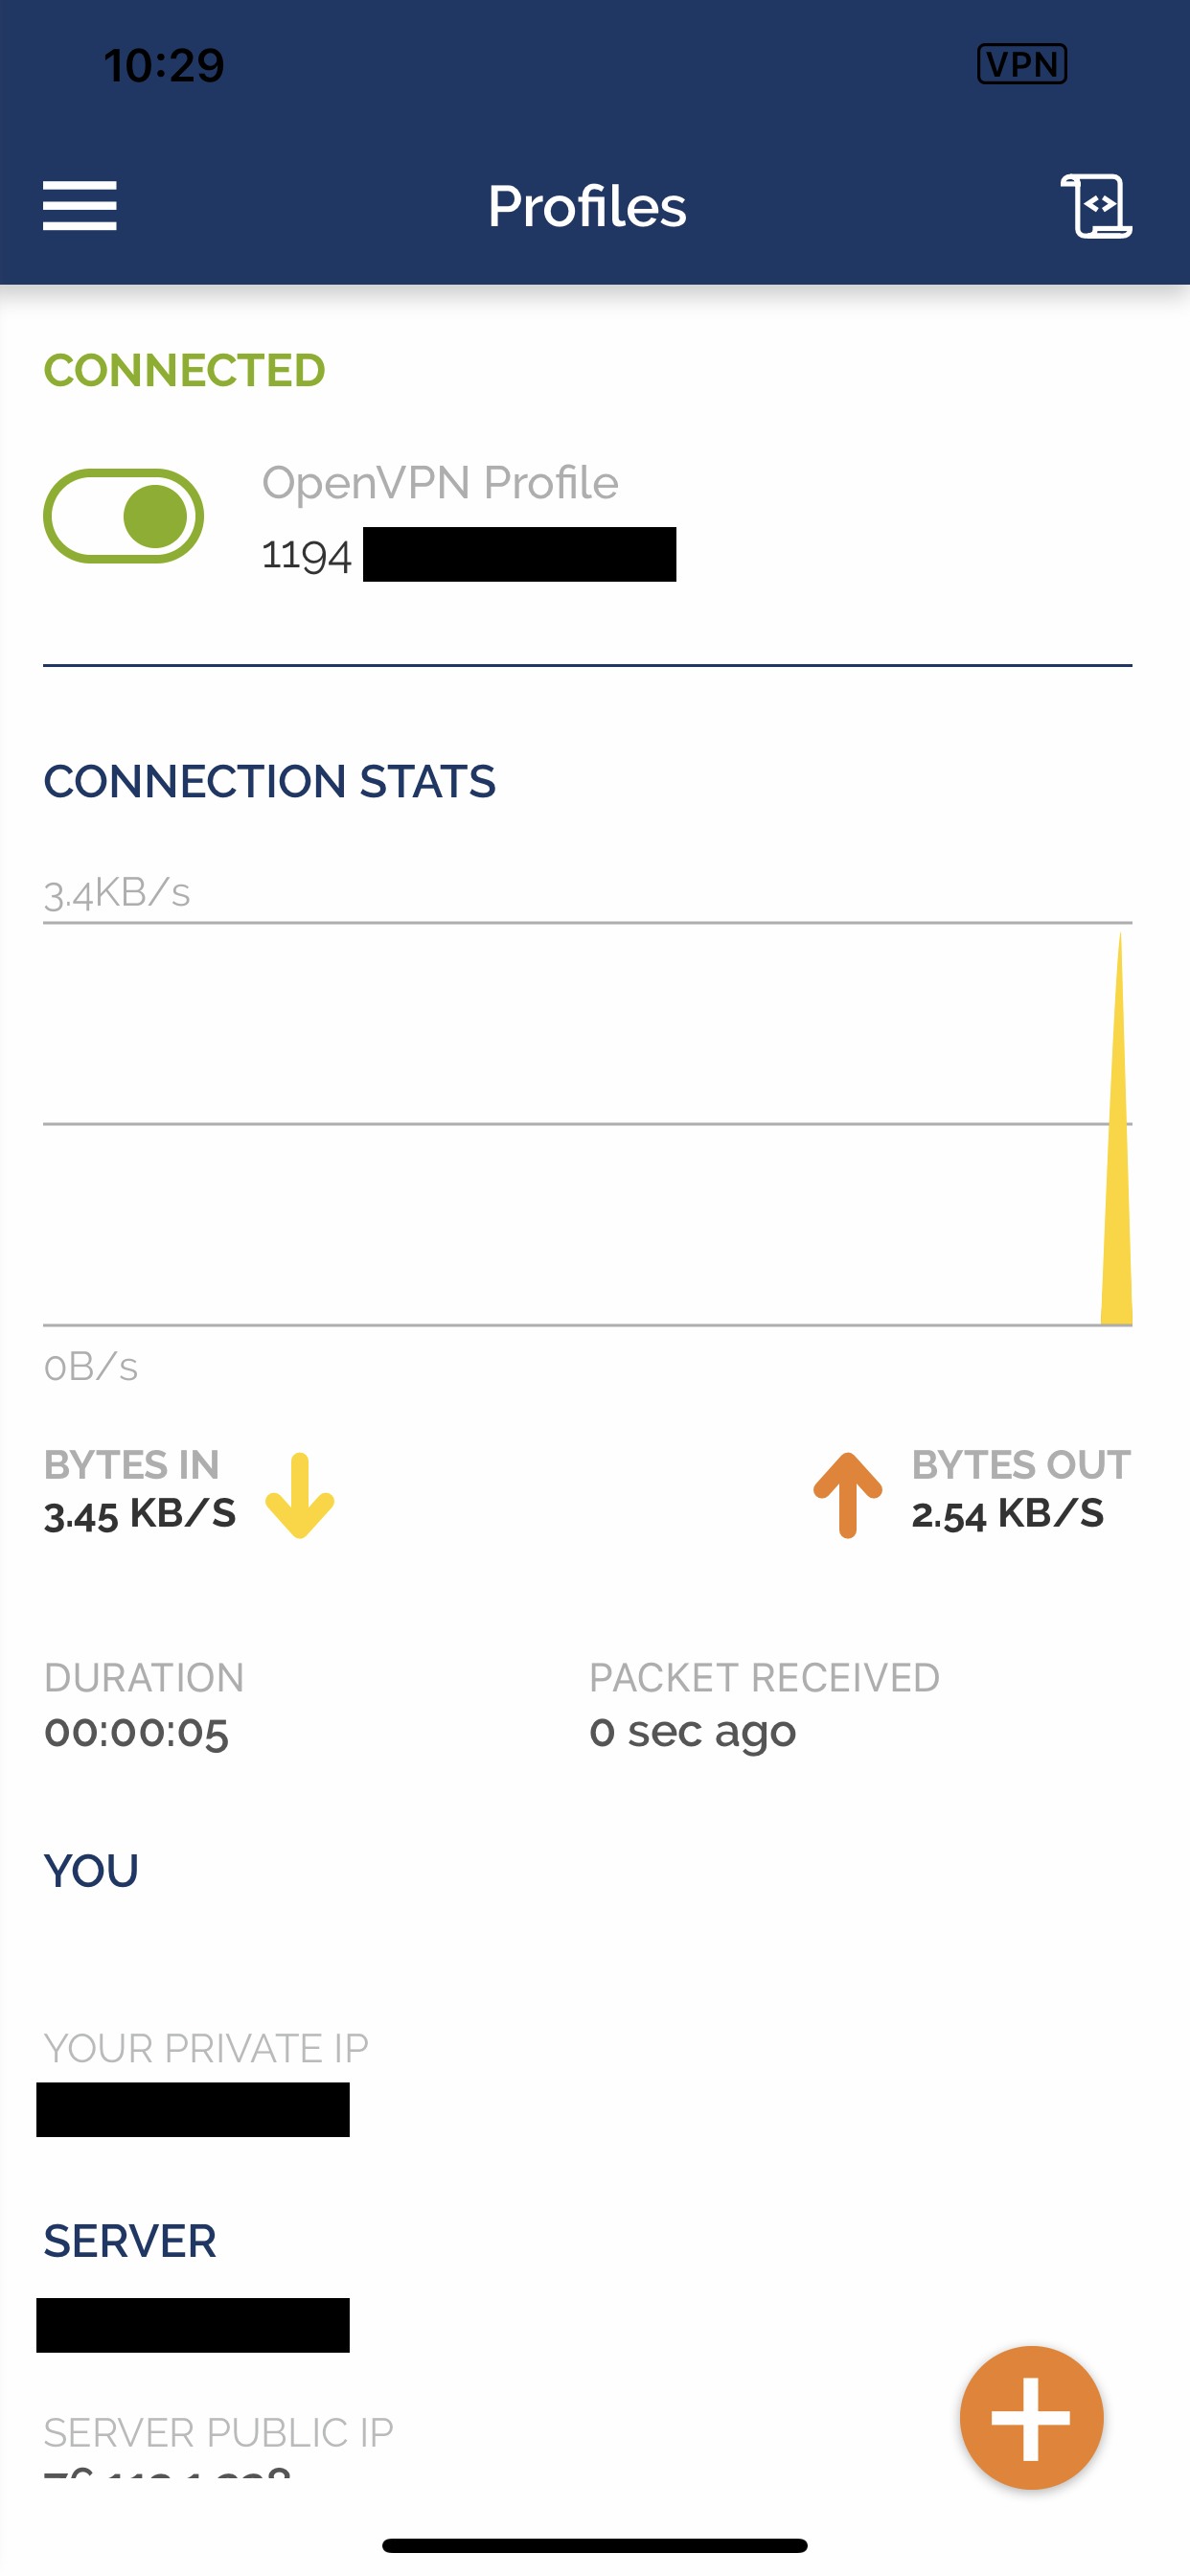
Let me say since I setup our PiHole our network speed seems to have dramatically increased and as you can see from the picture below our network traffic have halved. I’m only theorizing here, but the increase in network speed seems to be from from a combination of having a local DNS within our home network, as well as denying network traffic to a TON of external resources.

I won’t be walking you through how to setup the RasberryPi with Rasbian, but if you haven’t set it up yet I would suggest starting with their documentation. (I setup my Pi using Rasbian Lite to reduce the number of wasted resources, since it will be mainly used as a headless network device.)
My PiHole setup consists of a Raspberry Pi 4 with 4GB of RAM and because of the heat issue that everyone’s complaining about; I also purchased a case with a cooling fan. I know, 4GB is way overboard for a for such a lightweight process and used as a local DNS server, but I’m also using it for a number of other services as well.
Begin setup
This first step isn’t required, but I ran the following command (lsb_release -a && uname -a) so you could see what Rasbian release this setup was build on.
No LSB modules are available.
Distributor ID: Raspbian
Description:  Raspbian GNU/Linux 10 (buster)
Release:  10
Codename: buster
Linux Falion 4.19.58-v7l+ #1245 SMP Fri Jul 12 17:31:45 BST 2019 armv7l GNU/Linux
Adjust Rasbian Configuaton
Next you’ll need to run sudo raspi-config and update the configurations listed below.
- Setup new password
- Set Hostname
- Set locales (en_us.utf-8, timezone, keyboard layout, country)
- Update raspi-cofig tool
After these changes, lets restart the Pi so the new configuration changes will be applied shutdow now -r
Since this will be an important component in your network, lets start out on the right foot and remember that we need to be thinking about security with every step along the way. Once your Pi has finished restarting, you’ll need to change the root password.
sudo su # This is used to switch to the root user
passwd  # Used to change the current users password
Next, lets update all currently installed packages and ensure security when installing optional packages.
# Update all software on the Pi
apt-get update && apt-get upgrade -y && apt-get install apt-transport-https ca-certificates -y
Hardening the Pi
I’m not going to cover every single step of hardening you’re RaspberryPi, but if you need an even deeper understanding of Linux security there are an endless supply of guides on how to harden a Debian based distro.
Lets start by create an additional user, and removing the default pi user. This is more of a security by obscurity, because everyone will knows that by default your devices will have a user named pi which gets them one step closer to having access to your device.
First we need to create the new user sudo adduser user_name
Now lets add the new user to the list of sudoers
sudo nano /etc/sudoers.d/010_pi-nopasswd
# This allows the new user to run sudo, but requires a valid password to entered first
user_name ALL=(ALL) PASSWD: ALL

# You can also run the following
sudo /usr/sbin/useradd --groups sudo -m user_name
You’ll now need to be sure to completely kill the current terminal session as the pi user, I’d suggest typing logout to make sure the session is properly killed.
The next step is to login as the user we just created, remove the default pi user that, and then remove this user from the list of sudoers.
(This may seem like a bunch of unnecessary steps, but we want to ensure at least a minimum level of security.)
# now ssh into the pi using the new user
ssh [email protected]
sudo su

# Remove the pi user
sudo deluser -remove-home pi

# Remove the user from the sudoer list as well
sudo nano /etc/sudoers.d/010_pi-nopasswd
-> pi ALL=(ALL) NOPASSWD: ALL
Let’s start with SSH
Now since I’m running this as a headless device on my network I’ll only be accessing this device through a shell terminal.
So the next step is to begin by locking down OpenSSH.
I know this complicates things to another level, but in my setup I generally prefer to to have a different SSH key a number of services.
I use one key for my DigitalOcean servers, one key for Github, another key for my works Gitlab account, etc etc.
The biggest issue with this is managing a growing number of keys, but if you keep up with configuring your SSH config file ~/.ssh/config as you generate the keys your maintenance should be pretty minimal. My rational behind this is; some people use a single key for every service which is logical, I mean it’s not exactly easy to crack a 4096 encryption key. But if you somehow happen to leak that one private key, any and all services you have associate with it are now compromised. If you have a different RSA key for each major service you use and one key gets comprised the impact should minimal rather than effecting a large number of services.
Now it may be a personal preference but rather than just generating a generic RSA key I prefer to use ed25519 keys, mainly because they’re small, fast, and very secure. (If you need instructions on how to generate ed25519 keys, I have a snip on one of my previous posts.)
Now we need to ensure we have the latest version of OpenSSH installed, to do this run the following command: sudo apt install openssh-server
The configuration I use follows pretty closely to a combination of the Mozilla SSH Guidelines (Modern) and TLDP recommendations.
Lets open our ssh_config file and replace the configuration with the snippet posted below - sudo nano /etc/ssh/sshd_config
# Adapted from the "Modern" configuration detailed on the Mozilla Security
# Guidelines wiki (https://wiki.mozilla.org/Security/Guidelines/OpenSSH).
# https://github.com/mozilla/socorro-infra/blob/master/puppet/modules/socorro/files/etc_ssh/sshd_config
# http://tldp.org/LDP/solrhe/Securing-Optimizing-Linux-RH-Edition-v1.3/chap15sec122.html
# docs: http://tldp.org/LDP/solrhe/Securing-Optimizing-Linux-RH-Edition-v1.3/chap15sec122.html
# Package generated configuration file
# See the sshd_config(5) manpage for details

Port 22
Protocol 2
HostKey /etc/ssh/ssh_host_ed25519_key
HostKey /etc/ssh/ssh_host_rsa_key
HostKey /etc/ssh/ssh_host_ecdsa_key

KexAlgorithms [email protected],ecdh-sha2-nistp521,ecdh-sha2-nistp384,ecdh-sha2-nistp256,diffie-hellman-group-exchange-sha256
Ciphers [email protected],[email protected],[email protected],aes256-ctr,aes192-ctr,aes128-ctr
MACs [email protected],[email protected],[email protected],hmac-sha2-512,hmac-sha2-256,[email protected]

# Completely disable password based logins, PublicKey login is required
PubkeyAuthentication yes
#AuthenticationMethods publickey,keyboard-interactive:pam # enables multiset authentication PublicKey->Password
AuthenticationMethods publickey
KbdInteractiveAuthentication yes

# Lifetime and size of ephemeral version 1 server key
KeyRegenerationInterval 3600 # to prevent descryption, regenerate connection keys
ServerKeyBits 1024

# Limit to users/groups
AllowUsers tarellel

# Don't read the user's ~/.rhosts and ~/.shosts files
IgnoreRhosts yes  # prevents login from trusted networks
#RhostsAuthentication no
RhostsRSAAuthentication no

# Logging
#SyslogFacility AUTH
SyslogFacility AUTHPRIV
LogLevel INFO

# Log sftp level file access (read/write/etc.) that would not be easily logged otherwise.
Subsystem sftp  /usr/lib/openssh/sftp-server -f AUTHPRIV -l INFO

# Authentication:
PermitRootLogin No
UsePrivilegeSeparation sandbox # prevent user privilege escalation
LoginGraceTime 30 # default 120/2m
StrictModes yes # checks user [~] permissions

X11Forwarding no # may wish to turn this off for security purposes it was defaulted to yes
AllowTcpForwarding no
# ClientAliveCountMax 2 # max amount of concurrently connected clients
# http://serverfault.com/questions/275669/ssh-sshd-how-do-i-set-max-login-attempts
# MaxAuthTries 1 # 1 login attempt per connection, before being dropped
# MaxSessions Specifies the maximum number of open sessions permitted per network connection
# MaxSessions 2

# https://patrickmn.com/aside/how-to-keep-alive-ssh-sessions/
# Keep idle TCP connections alive (kill idle connections)
TCPKeepAlive no
ClientAliveInterval 120 # how long the connection can be idle (seconds)

# NOTE: It's best to disable this when forwarding is also disabled
Compression no

PasswordAuthentication no
PermitEmptyPasswords no
ChallengeResponseAuthentication yes

# Login/Logout messages
PrintMotd no
# Banner /etc/issue.net

UsePAM yes
# Ensure /bin/login is not used so that it cannot bypass PAM settings for sshd.
UseLogin no
UseDNS no
Next you’ll need to ensure your personal machines public ssh-key is on the Raspberry, so you won’t be locked out of the device. On your local machine run pbcopy < ~/.ssh/.ssh/localnetwork_id.pub this copys the contents of your SSH’s publickey to your clip. (As I mentioned before, I prefer to generate SSH keys for different services. The SSH-key localnetwork was generated for all devices in my local home network).
Now go back to the terminal and ensure the authorized_keys file creates for the current user in the ssh folder mkdir ~/.ssh; chmod 0700 ~/.ssh; touch ~/.ssh/authorized_keys; nano ~/.ssh/authorized_keys. The last part of this command opens up the authorized_keys file in nano, since you previously copied the contents of you public key to your clipboard lets go ahead paste into the this file and hit CTRL-X and save the file. After the contents have been saved you’ll need to chmod it to ensure access to it’s contents is limited chmod 0600 ~/.ssh/authorized_keys. In order for all these changes to be applied you’ll need to restart the ssh process sudo systemctl restart ssh (you could always do something like systemctl reload ssh but I prefer to just restart the process).
Lets add a firewall
I’m sure there will be some moaning that I’m using UFW over IPtables, but I find UFW to be easy to get started with and it does exactly what I need.
Let’s begin by installing the UFW package sudo apt-get install ufw. But for me, after intalling UFW I started getting “an IP tables error has occured” when trying to start the UFW server. So again I restarted the Pi and after it had finished reloading all errors were gone. Below are the UFW rules used to begin security incoming network services for your device, before running these commands it helps to su sudo so you’re creating these rules as a root user.
# Some people also prefer to be extra cautious and also begin by blocking all outgoing connects `ufw default deny outgoing` ports.
ufw default deny incoming # Block ALL incoming ports
ufw allow ssh
ufw allow 53    # DNS port
ufw allow http  # Port 80 & 443 are used by PiHole to display a dashboard with PHP/lighttpd
ufw allow https

# Limit the number of login attempts on SSH port
ufw limit ssh/tcp

# Allow FTL pihole engine from LAN (if you are using a different subnet specify this instead)
ufw allow from 192.168.1.0/24 to any port 4711 proto tcp

ufw enable
Now that a few basic firewall rules have been creates let’s reload the UFW service in order for these rules to start being applies sudo ufw reload.
Fail2Ban
Next we’ll setup Fail2Ban, which is one of my favorite tools to prevent BruteForcing and/or credential stuffing login attempts. With the firewall setup; we’ve already taken the measure of preventing network requests to a large number of ports and services. But whenever there’s an open SSH port, I guarentee you it will get hit with requests. (I averted this by only having a VPN port on my router and in order to access my network from outside the network requires you to conenct via VPN into my network, but I’ll cover that farther down.)
Begin by installing the fail2ban package apt install fail2ban, than we’ll adjust the configuration to begin monitoring any and all ssh login attemps
sudo cp /etc/fail2ban/jail.conf /etc/fail2ban/jail.local
sudo nano /etc/fail2ban/jail.local
Once nano has opened up /etc/fail2ban/jail.local hit Ctrl+W and search for [sshd] and change the configuration for ssh to the following.
[sshd]
enabled  = true
port     = ssh
filter   = sshd
logpath  = /var/log/auth.log
maxretry = 3
bantime = -1
Now lets restart and enable fail2ban and verify the process and configuration have properly loaded
service fail2ban restart; service fail2ban start enable

# Verify fail2ban is running
service fail2ban status
This step isn’t required, but I like to get the fail2ban client status to ensure the sshd jails (or any others you may add) are enabled sudo fail2ban-client status
Status for the jail: sshd
|- Filter
|  |- Currently failed:	0
|  |- Total failed:	0
|  `- File list:	/var/log/auth.log
`- Actions
   |- Currently banned:	0
   |- Total banned:	0
   `- Banned IP list:
Unattended Upgrades
Another one of my favorite tools on a Debian based distro is Unattended Upgrades. For those of you who have never used it before, it will systematically apply security updates, distro updates, or whatever kind of upgrades you choose to allow it to update. I prefer to keep everything up to do, but it can be danger to enable allowing automatic updates to something such as a webserver. If this is the case, I’d suggest only enabling security updates; because major package upgrades can and will break your software.
Again let’s begin by installing the required packages sudo apt-get install unattended-upgrades -y. Once the package has installed you’ll need to update it’s default configuration sudo nano /etc/apt/apt.conf.d/50unattended-upgrades to the following:
(The contents of the file specify what updates to look for.)
Unattended-Upgrade::Origins-Pattern {
  // Codename based matching:
  // This will follow the migration of a release through different
  // archives (e.g. from testing to stable and later oldstable).
  // Software will be the latest available for the named release,
  // but the Debian release itself will not be automatically upgraded.
  "origin=Debian,codename=${distro_codename}-updates";
  // origin=Debian,codename=${distro_codename}-proposed-updates";
  "origin=Debian,codename=${distro_codename},label=Debian";
  "origin=Debian,codename=${distro_codename},label=Debian-Security";
  // Archive or Suite based matching:
  // Note that this will silently match a different release after
  // migration to the specified archive (e.g. testing becomes the
  // new stable).
  // "o=Debian,a=stable";
  // "o=Debian,a=stable-updates";
  // "o=Debian,a=proposed-updates";
  // "o=Debian Backports,a=${distro_codename}-backports,l=Debian Backports";
};
The next step is to open up /etc/apt/apt.conf.d/20auto-upgrades and configure what components of unattended-upgrades you want to enable. In order to keep my packages up to date with the latest changes I changed mine to the following configuration:
APT::Periodic::Update-Package-Lists "1";
APT::Periodic::Download-Upgradeable-Packages "1";
APT::Periodic::Unattended-Upgrade "1";
APT::Periodic::Verbose "1";
APT::Periodic::AutocleanInterval "7";
Now let’s enable unattended upgraded as a low priority process sudo dpkg-reconfigure --priority=low unattended-upgrades to being monitoring and applying future updates in order to keep our device secure.
Installing PiHole
I know thus far, it’s been like provisioning any other Linux box; but now comes the fun part.
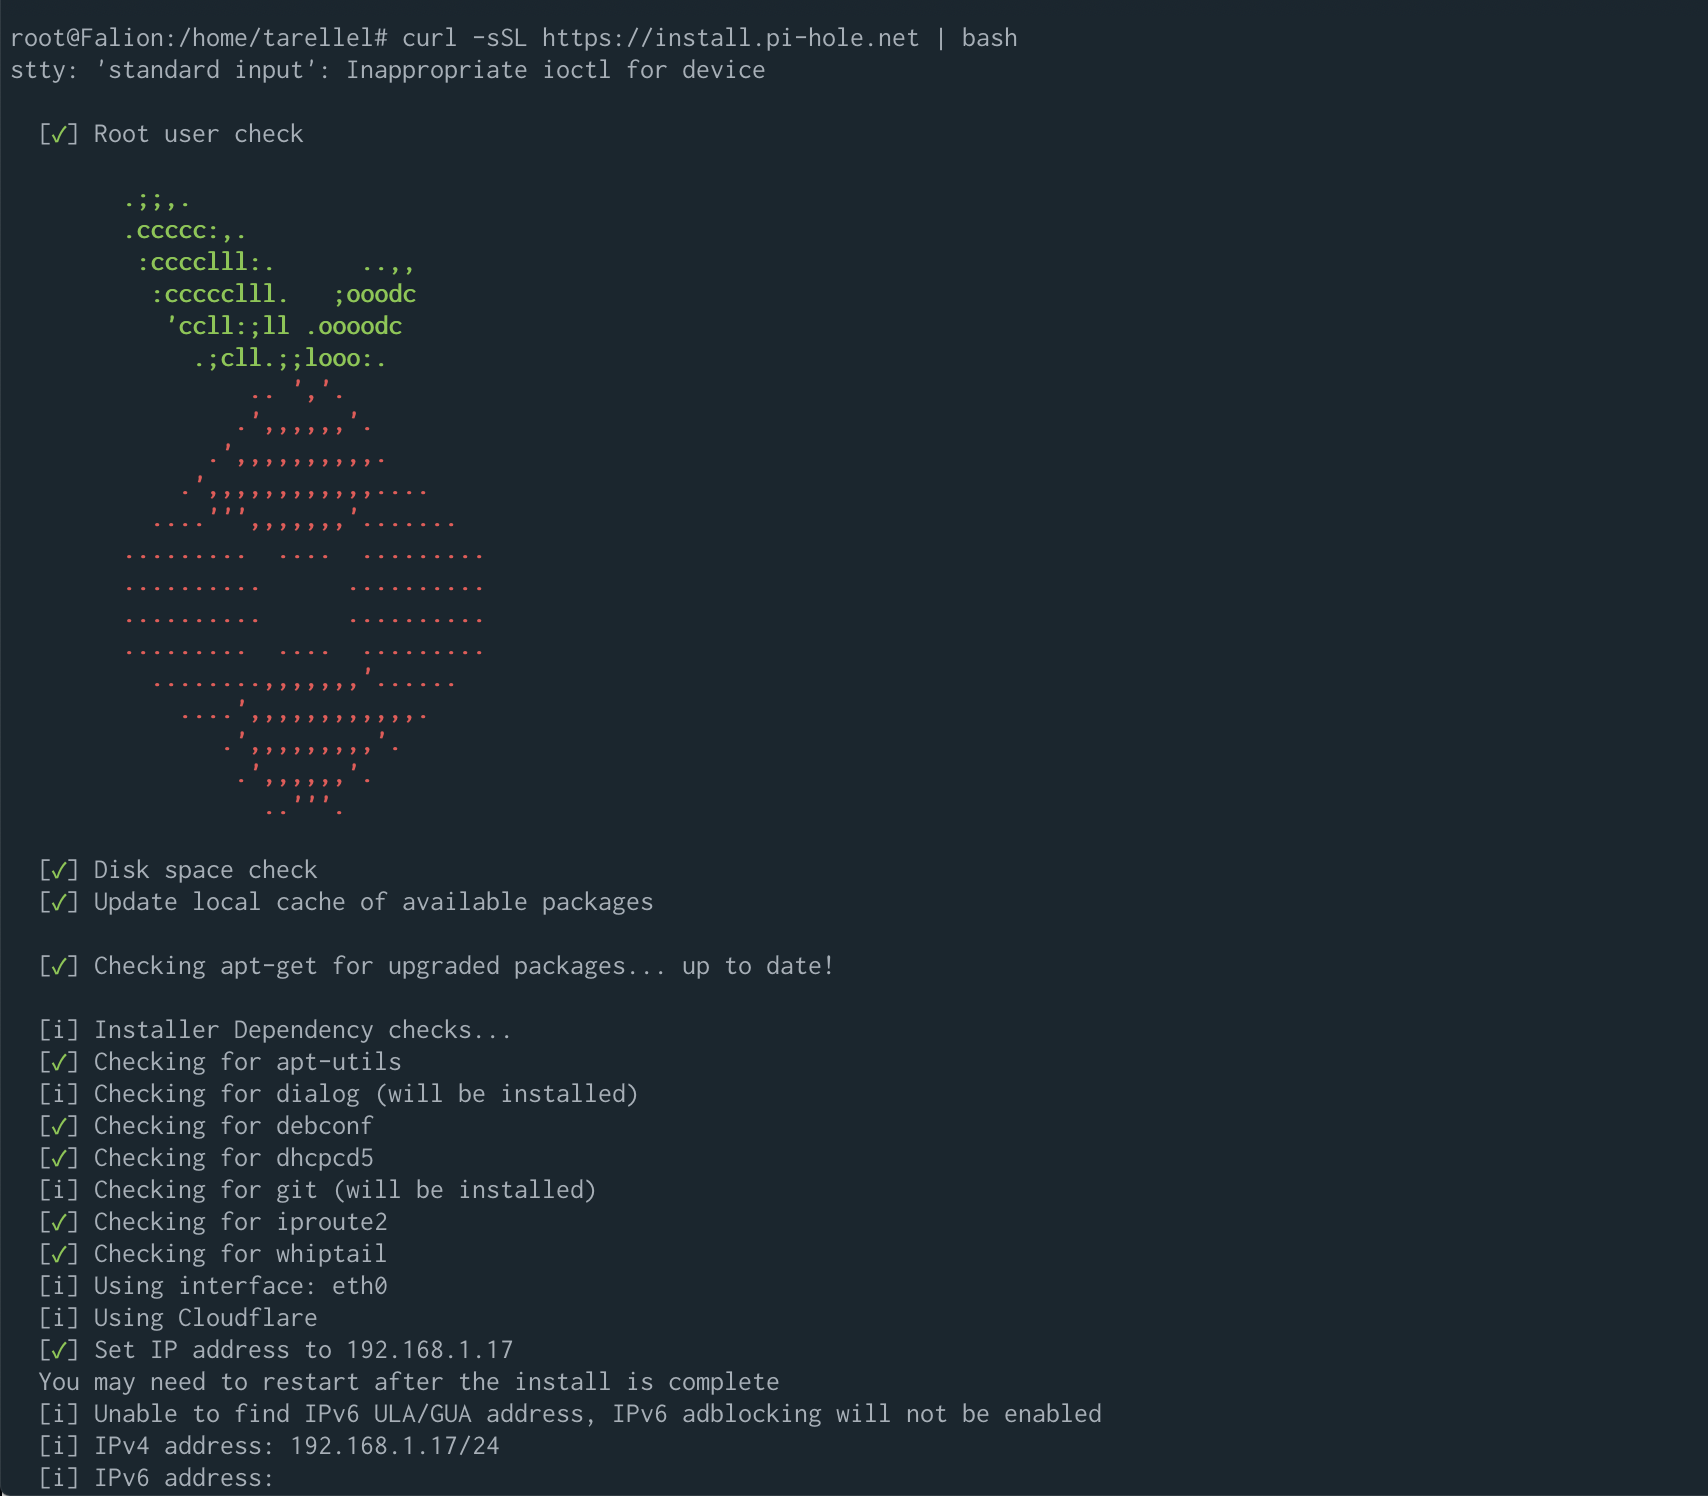
To get started quickly run the following command curl -sSL https://install.pi-hole.net | bash, it does take a few moments because it attempts to install any additional required libraries. It also required to select a number of configurations based on how you like your PiHole setup.


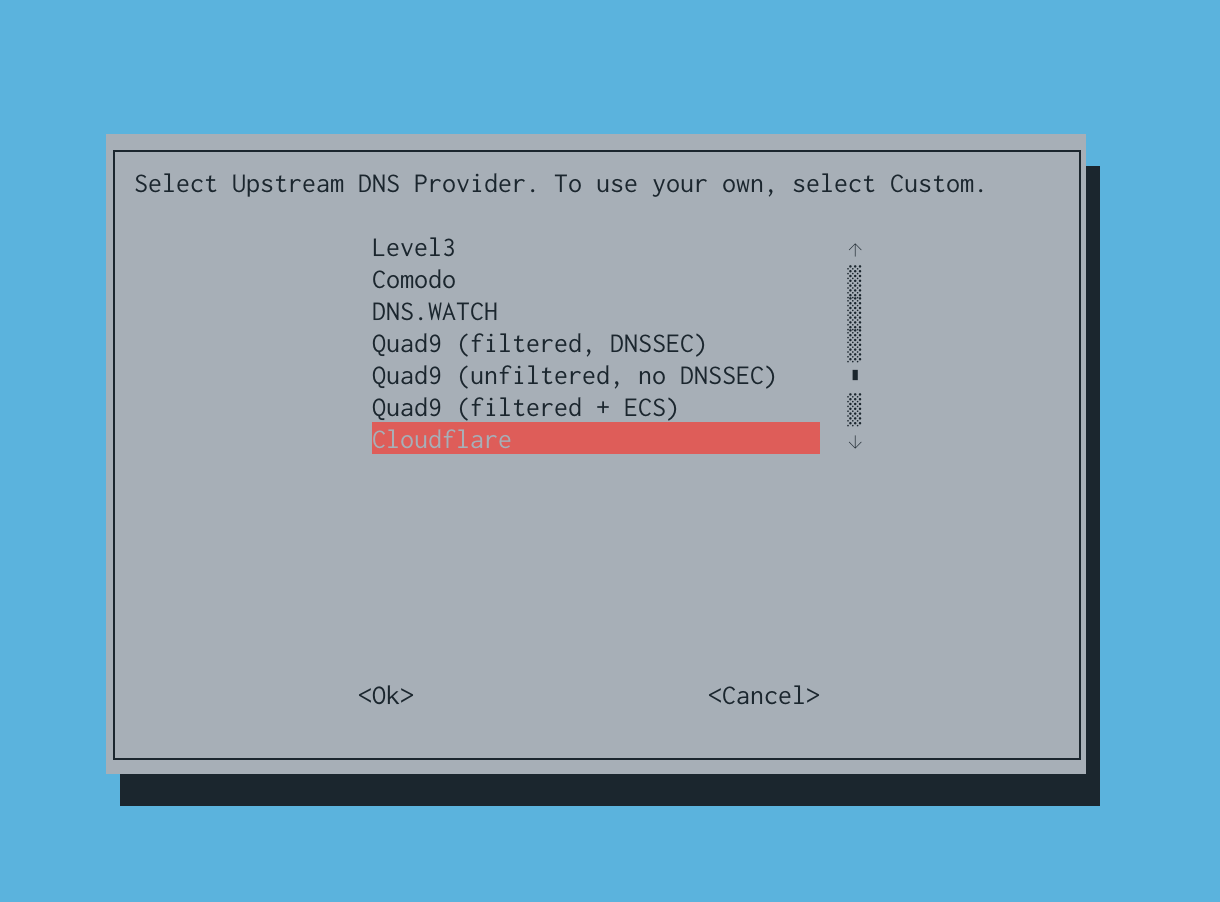
After going through a few of the setup screens you’ll be presented with your fix big choice. Which DNS Upstream do you with to use? You’ll be presented with a number of choices, including but not limited to Google, OpenDNS, Level3, CloudFlare and a number of other choices. I’m my opinion I suggest picking CloudFlare their DNS service is extremely fast and their whole suite of services is about providing security by default.
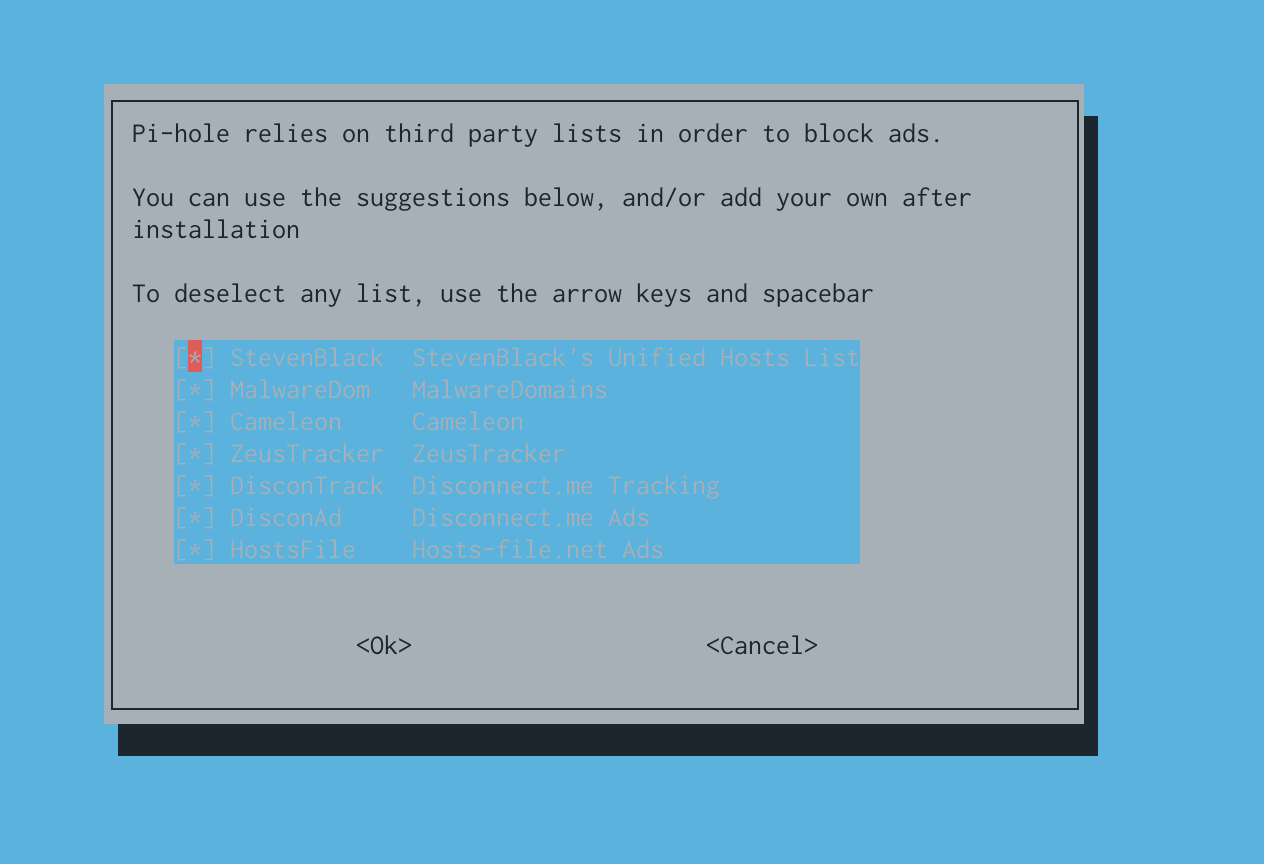
Next you’ll be present with of thirdparty blocklists to choose from, this is completely up to you and what you want to block. And you can always add more later (which we do with this walkthrough).

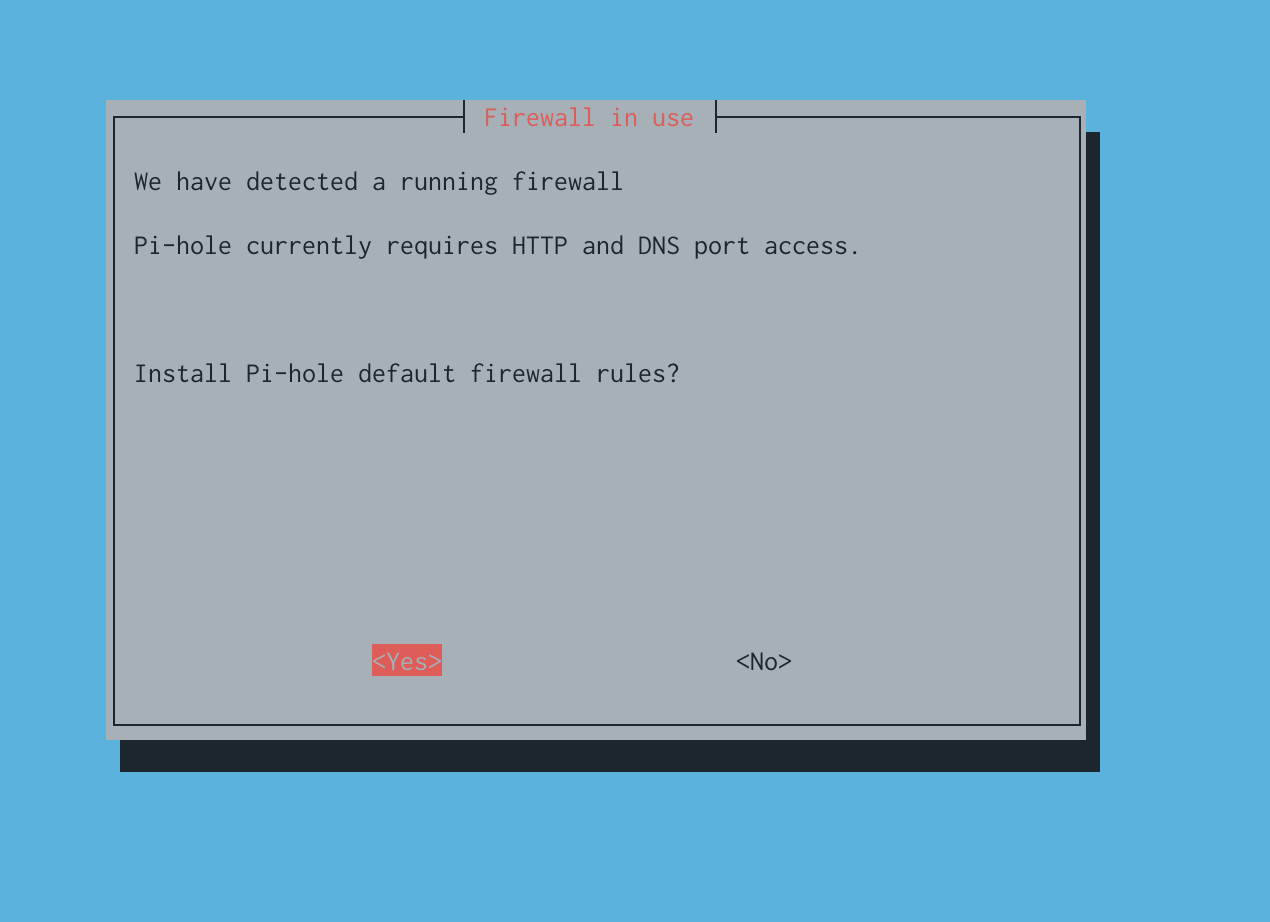
Since we setup UFW network requests should be filtered. Part of the installation script ensures that the proper ports available in order for the pihole to function properly.
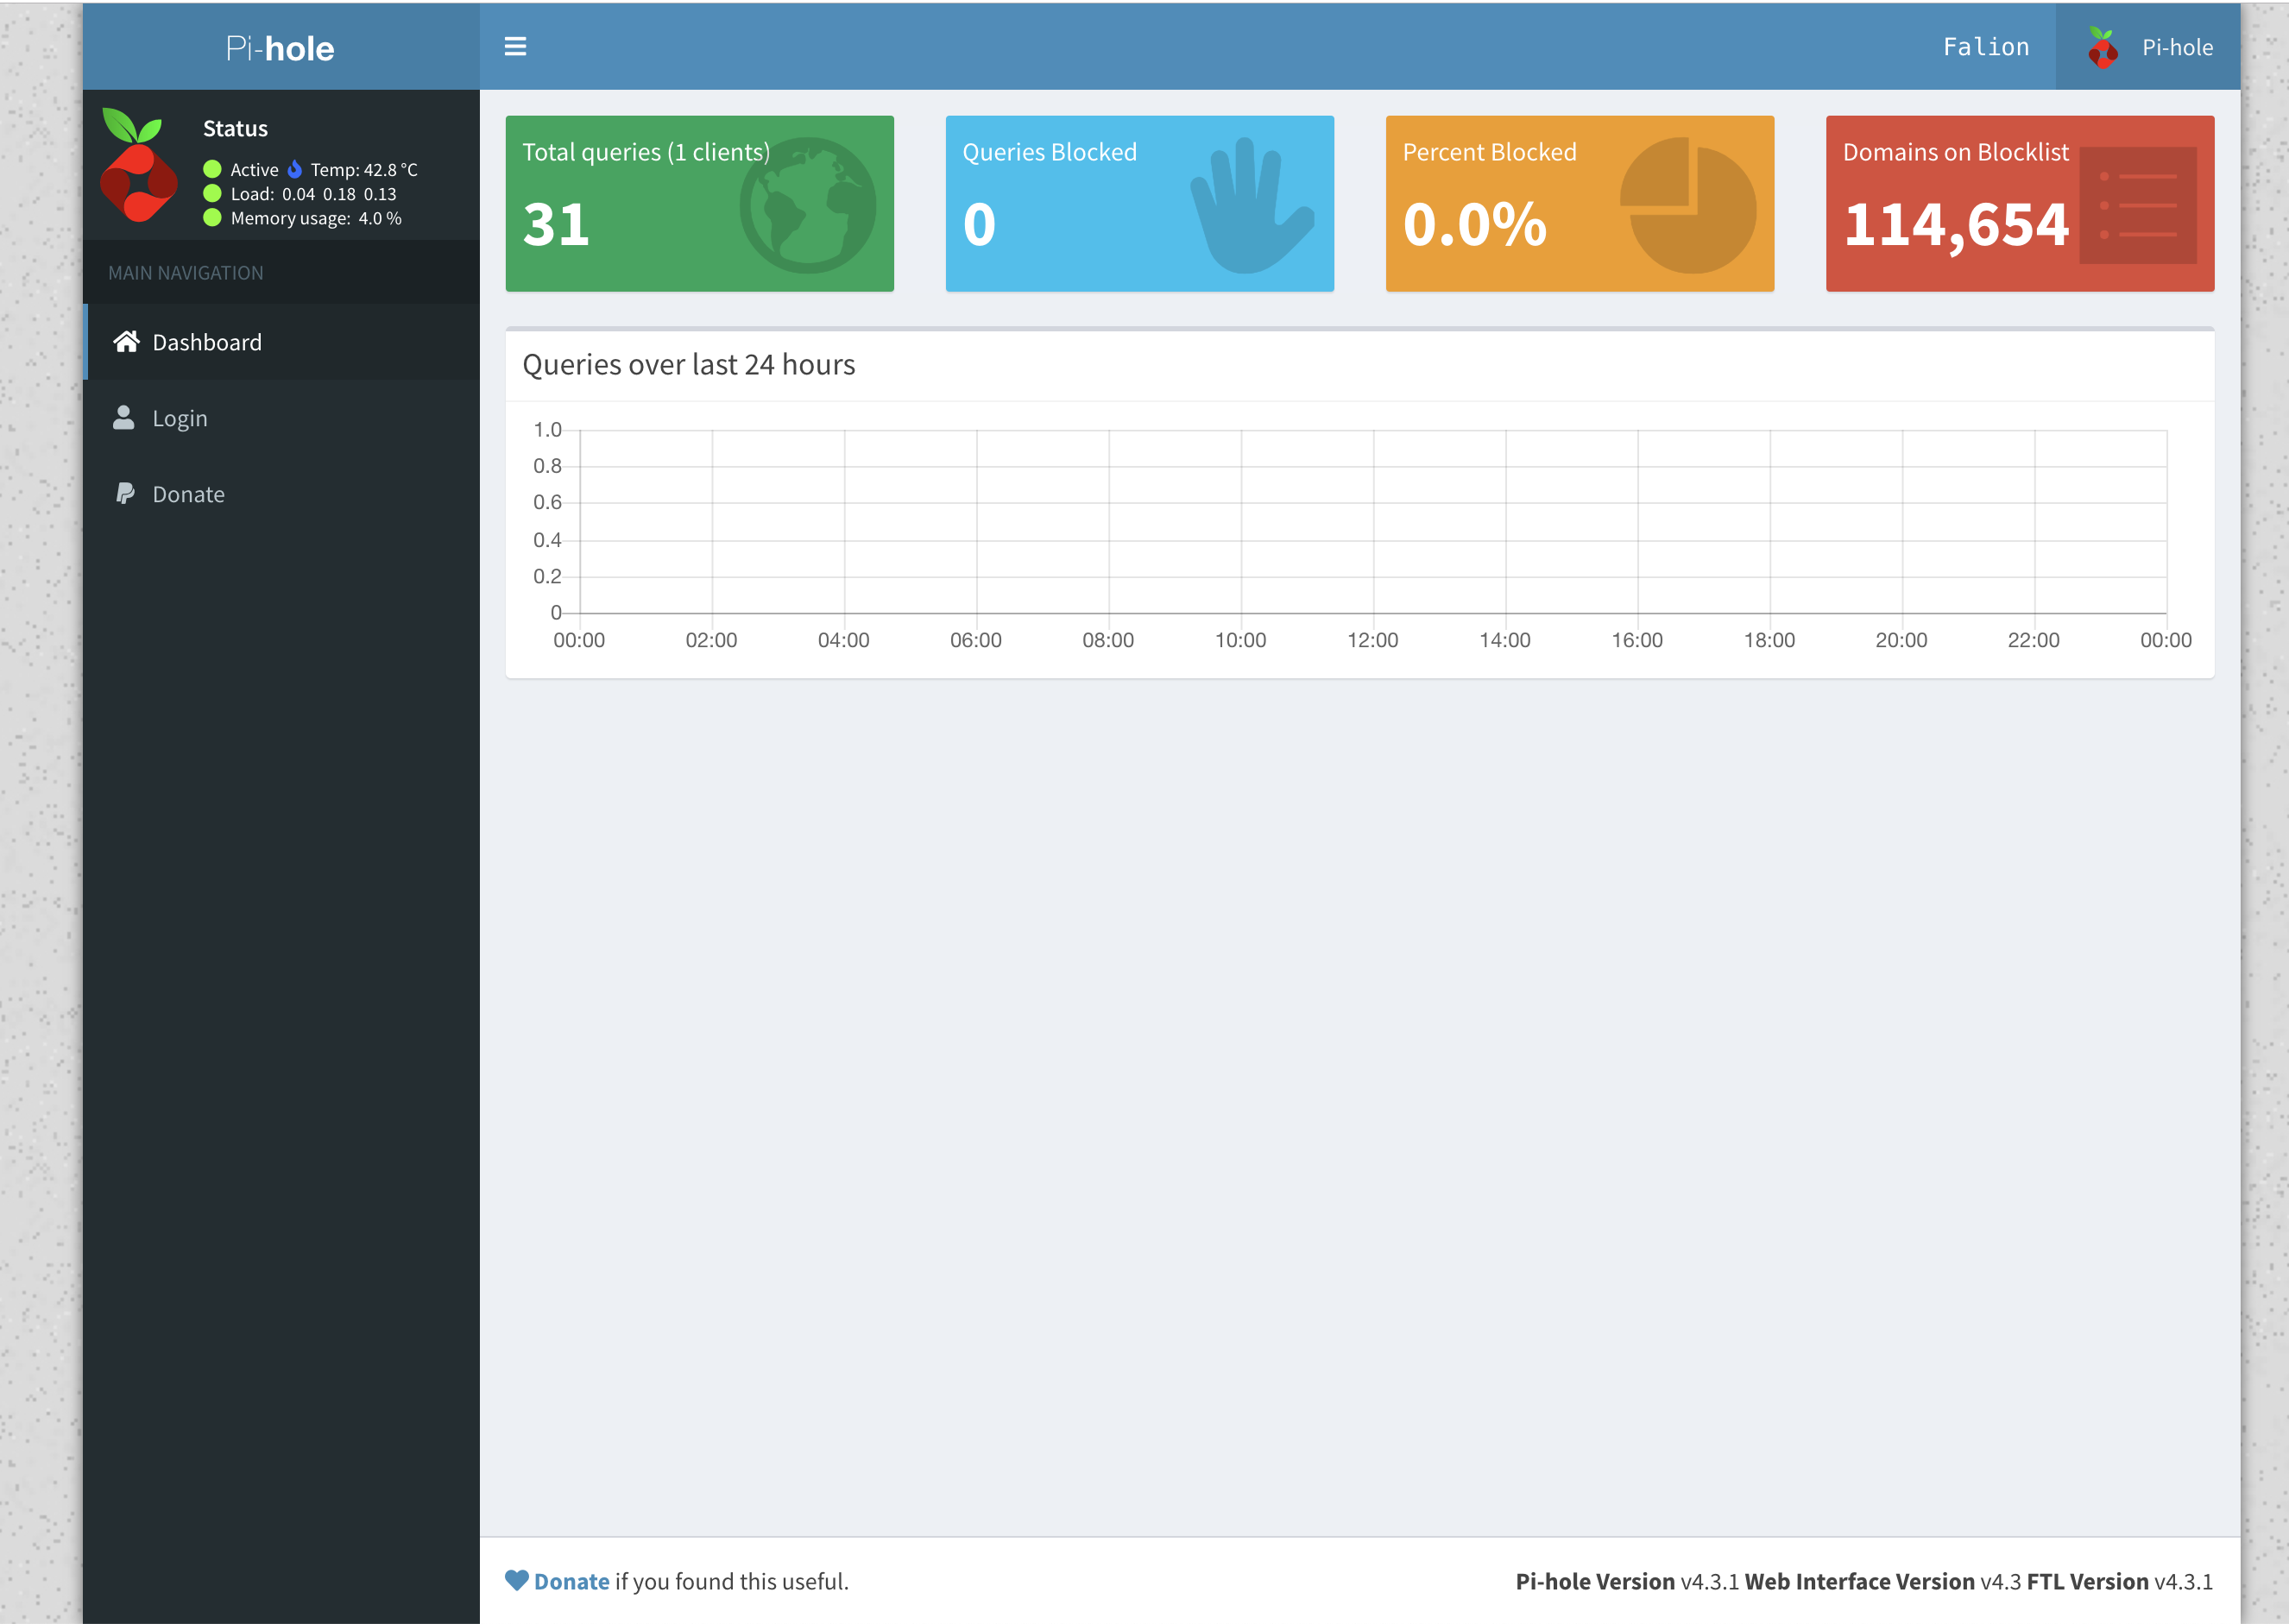
Once the installation has finished installing you should be presented with a final menu telling you your PiHoles dashboard address and password. (The address should be something like http://192.168.1.5/admin). When visiting the dashboard you should be presented with something similar to the following image:
Now for the most part you’re almost, next we’ll need to configure our router to query the PiHole service for any DNS requests.
To do this you’ll need to change your Routers DNS settings to use the internal IP Address for the RaspberryPi.
I also applied CloudFlares DNS IP Addresses 1.1.1.1 and 1.0.0.1. This is because for any reason the Pi is shutdown or inaccessible your network won’t come a dead halt, it’ll fallback to the secondary DNS server (Cloudflare).

Setting up VPN Access
PiVPN is an insanely easy to install and the Pi alternative to installing OpenVPN on an ARM chip.
To install it lets run the following command curl -L https://install.pivpn.io | bash
Again the commandline menu screen will come up and walk you through the various steps to install PiVPN, some of the steps are pretty quick but once you get to where it needs to generate a certificate for your VPN it will take a while. Once OpenVPN started generating a certificate for the VPN I stepped away because for a snack, but it took a good 5 or 10 minutes to generate.
Something to note, I ended up having to set the VPN’s DNS settings as the PI’s static IP Address.
It may have just been the situation, but when I was VPN’ing in and the DNS was set as the IP address of the router 192.168.1.1 it was causing my computer the pull DNS from the actual network I was connected to rather then through the PiHole service.
In order to mitigate this I ended up changing the VPNs DNS settings to use it’s own IP address as the DNS server.
To do this we’ll need to modify the openvpn config nano /etc/openvpn/server.conf and change the following
push "dhcp-option DNS 192.168.1.1" to push "dhcp-option DNS 192.168.71.1" or to whatever you Pi’s ip address is.
If you don’t know your current local IP address you can get this by running ifconfig and getting the ip address listed under the eth0 network adapter.
After this step was complete I ended up rebooting the Pi again, so all the new configuration changes and services would be applied.
We’re still a ways off from being finished with setting up the VPN, once the Pi has finished rebooting we need to add users to the VPN. This can be done by running the command pivpn add.
You may want to just have a user and make them authenticate with the signed key, I’m a little cautious and decided to have my user (of course me) require to have a password as well as the signed key to authenticate to the VPN. If you end up needing help or finding additional commands for the VPN you can run the command pivpn help.
The next step I did was pull my generated VPN file to my computer so I could add it to my computer and phone. If you do plan on using your phone, for security reasons I suggest having a seperate VPN key for your computer and mobile phone.
To pull the openvpn signature file to you computer using scp, you can run a command similar to the following: (Towards the end of this post I’ll explain how to use the on ur phone or macbook)
scp -i /Users/pi_user/.ssh/localnetwork_id [email protected]:/home/tarellel/ovpns/tarellelRemote.ovpn .
The next step is to enable access to the VPN ports, otherwise we’ll still never be able to VPN into the network through the PI. I started by enabling the UDP VPN port ufw allow 1194/udp, but for some reason I had issues. To get around this I ended up having to remove this rule and just enable access to the 1194 port in general ufw allow 1194.
After opening up the VPN ports I decided to reload it’s configuration, it may be a bit redundent but what’s it going to hurt.
sudo /etc/init.d/openvpn reload
# Just to verify openvpn reloaded properly
sudo systemctl status openvpn
Now we need to update openvpn’s network devices priority sudo nano /etc/pihole/setupVars.conf and add the following PIHOLE_INTERFACE=tun0 below eth0. The pretty much tells openVPN to use eth0 as it’s primary device and tun0 as the pihole virtual network device.
Next we’ll need to list the devices in which we want to allow to make DNS requests through the dnsmasq network service. To add the devices lets open it up nano /etc/dnsmasq.d/01-pihole.conf and add the following list of devices.
interface=eth0
interface=tun0
Since we’ve just make some more changes to the OpenVPN configuration and firewall lets reset these services (yes again, I know).
service openvpn reload
service openvpn restart
systemctl enable ufw
Install log2ram
This next step is pretty important, the reason being SD cards aren’t meant to have files written on and removed from at a constant pace, especially when it comes to generating logs. It’s like havine a piece of paper writing on it and than erasing it, over and over again. Eventually that piece of paper will become useless, the same can be said for SD cards. To mitigate this, we end up using log2ram which will save our logs in memory and once it consumes X amount of memory it’ll save as an actual log file.
The following steps are copied directory from the projects documentation.
curl -Lo log2ram.tar.gz https://github.com/azlux/log2ram/archive/master.tar.gz
tar xf log2ram.tar.gz
cd log2ram-master
chmod +x install.sh && sudo ./install.sh
cd ..
rm -r log2ram-master
Now before doing anything else we’ll need to restart the server again shutdown now -r.
After your device has came back up, we’ll need to adjust the log2ram’s configuration by editing the following file /etc/log2ram.conf. And chance the following:
# Change
SIZE=40M

# Lets increase the RAM log size to 100M
SIZE=100M


# You also want to disbale creating report error mails
MAIL=true
# Change it to falsse
MAIL=false
I know you’re getting tired of it, but again we’ll need to restart the Pi in order for the new RAM/log configuration to be properly come into effect. shutdown now -r
Update Raspberry Pi’s bootloader
If you’re device is pretty fresh out of the box I can almost guarentee you that your Pi will need to have it’s bootloader updated. I’m just going to list the steps take in order to verify and apply a bootloader update
apt-get update && apt-get install rpi-eeprom

# enable checking for bootloader updates
systemctl unmask rpi-eeprom-update

# For the O/S to check for a bootlaoder update
rpi-eeprom-update

# If the results show an update you'll need the Pi to prepare the page for update
rpi-eeprom-update -a

# In order for the bootloader update to be applied a restart is required
shutdown now -r
If you’re device requires an update your results should look similar to the following screenshot.

Update PiHole Blocklists
By default the basic list that your Pihole uses is pretty decent it blocks quite a bit of the heavy ad and trackying systems, but I prefer to block more. This is because as I watch my traffic I noticed several of the devices in my houses are still sending requests to various tracking URLs including my smart TV, my kids tablets, my printer, etc.

First you’ll want setup your blocklist of DNS requests to start blocking as many trackers as you possibly can. My list of blocklists is ended up including about 2 million different links and ends up blocking anywhere between 40-70% of my daily traffic (my list of blocklists). Once you add these lists to your piholes blocklist and update you Pi gravity rating you’ll almost instant notice pages are loading faster and you traffics congestion has been massive reduced.
Not lets add some regex filters to filter out any of those DNS that haven’t been caught by the blocklists. The regex filters I use, I believe I got some piecing together a few reddit posts together. They are specifically setup to catch any DNS requests that have the phrase tracker, traffic, ads, analytics or various other phrases
Next you’ll need to add some your whitelists, mine if a bit liberal and I need to go through and trim it down. But I started out by making it pretty broad, because otherwise spccific services and devices would no longer work on my home network because they uptime ping backs were completely disabled. These included; our xbox, Spotify, updating my kids android devices, updating our LG Smart TV, using our Plex server, Hulu, accessing namecheap, and blocking facebook (which I’d prefer, but my wife can’t list without) from the network. My whitelist can also be found also be found on github as a gist. After updating and all all these URL’s and snips to your piholes list, you’ll also want to update and reload your piholes gravity list again. This is to ensure anything added to the whitelist hopefully won’t still be filtered and any regex you added will have hopefully be properly filtered.
Applications to use
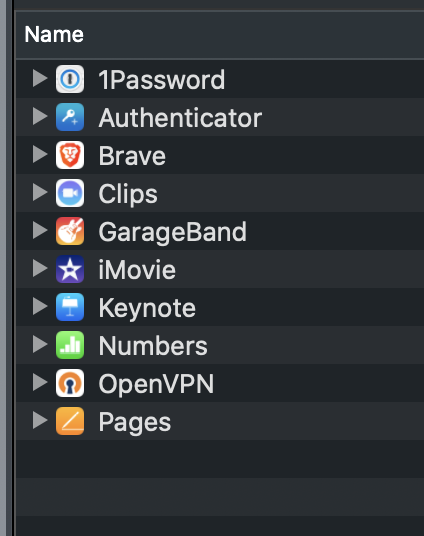
In order to VPN into your network (if you want to use the Pihole when outside your network), you’ll need to download the specified VPN client. If you are using an iPhone you’ll need to use OpenVPN iOS client, for android you can download the OpenVPN app, and for OSx I used Tunnelblick.
In order to use the VPN client on your iPhone you will need to connect it to your computer, similar to how you would sync data between the two or doing a backup.

Than on the list of options available for your phone , you need to click the files tab, this will allow you to access the files on your phone. We’ll now need to find the VPN key we generated and scp‘ed from the Raspberry Pi earlier. And you’ll need to dump it on the OpenVPN application. It may prompt you if you’d like to trust the file be transfered to your phone. Accept it and it should setup the VPN connection configuration for you on your phone.
This won’t work while you’re in the same network, but if you turn off wifi or connect from outside the network you should be able to connect like the pictures below. (if you added a password to your VPN key you may also need to occasionally input the password before it will allow you to connect or use the key).