Installing Fish on OSx
As developers we all use the command line, to make things happen. And by now you know there’s several shell environments ranging from zsh, kornshell, C-Shell, bash and to who knows what variants of there out there. Some of these shells are complicated beasts and some of them include a scripting language of their own. But they all have a purpose and they have their dedicated users. I for one can say for the past several years I’ve been a heavy user of zsh along with the addition of oh-my-zsh for the customization, easy plugins, and user friendly terminal.
![]()
From what I could find the majority of POSIX developers tend to stick with BASH which is very universal, widely used, and easy to learn. And mac OS users, tend to stick with either bash or zsh, I mean why change what’s not broken, right? Well it never hurts to try something new, I don’t mean the newest shiniest toy that’s available. And who know’s it could always make a huge difference in your productivity. Well after hearing quite a bit of hype from various developers about the fish shell I decided to give it a try. And thus far, I’m loving it. It’s very smooth, has a quick response time, seems less bogged down like various other shells. It also has an amazing auto-complete/command prediction behavior that makes things quite a bit easier and faster for the user.
In this article, I am going to show you how I documented installing the fish terminal, numerous of it’s extensions, and themes.
Installing Fish on OSx
First of all if your a mac OS developer and looking to install custom software, you more than likely already have homebrew. Brew makes installing programs through the command-line a heck of a lot easier than building with a makefile, or having to bundle dependencies and packages. And than having the compilation fail on you.
To install fish it’s quite simple, just begin by issuing the following commands:
brew update
brew install fish
Now you’re not quite ready to go, you need to add Fish to your systems shell listing in /etc/shells, this does require administrative access.
sudo echo '/usr/local/bin/fish' >> /etc/shells
Now that fish is installed, in order to use it lets begin by setting it as your default terminal shell environment.
chsh -s /usr/local/bin/fish
Now in order to load fish as your shell you’ll need to either open a new window, tab, session, etc. It may look like the same old terminal that your used to, but it’s not. If you would like to see some of the features fish offers, I’d suggest checking out their tutorials page. Now for some reason when I first installed fish it didn’t update/load the autocompletions, if this is the case for you issue the following command fish_update_completions, it’ll take a moment because there’s quite a few to download. If your looking for a rough idea of what they have autocompletions consist of, I’d suggest checking out their list of autocompletion files.
Lets talk plugins
Part of using fish it make life easier on you, to get things done faster and more efficient. That’s why no matter what we do, we’re always looking for plugins, shortcuts, and extensions. Just like using brew, well install a fish plugin manager in order to make installing plugins as smooth as possible. At the moment there’s a variety of fish plugin in manager including: fisherman, fundle, oh-my-fish and a few others. In my opinion the more mature one seems to be fisherman, which is what quite a few fish users seem to prefer using. On the other hand, I chose oh-my-fish because of it’s ease of use and simple commands. I mean as developers we’ve learned 100’s of linux commands, functions, methods, attributes, etc. who wants to complicate our lives and add even more to memorize. So lets install oh-my-fish to get the customization started.
curl -L http://get.oh-my.fish | fish
Now if would like to get a rough idea of the oh-my-fish commands available, lets just issue the omf command.
$: omf

Usage:
  omf install [<name>|<url>]
  omf theme [<name>]
  omf remove [<name>]
  omf search [<name>]
  omf update
  omf help [<command>]

Commands:
  list      List local packages.
  describe  Get information about what packages do.
  install   Install one or more packages.
  theme     List / Use themes.
  remove    Remove a theme or package.
  update    Update Oh My Fish.
  cd        Change directory to plugin/theme directory.
  new       Create a new package from a template.
  search    Search for a package or theme.
  submit    Submit a package to the registry.
  destroy   Uninstall Oh My Fish.
  doctor    Troubleshoot Oh My Fish.
  help      Shows help about a specific action.

Options:
  --help     Display this help.
  --version  Display version.

For more information visit → git.io/oh-my-fish
By now you’ve probably installed several programs that generate several .dotfile folder directories in your $HOME directory. Fish/oh-my-fish is no different, except instead of piling up even more in your $HOME directory, fish config files will be stored in ~/.config/fish. The .config path is used by several programs in order to reduce clutter being built up in your $HOME directory. Because I’m sure if you entered in ‘ls -alH’ in the prompt you get something similar to the following.
.oh-my-zsh
.rbenv
.rvm
.vim
.tux
.ssh
.npm
.irbrc
# And tons of others as well
Now let it be a new install or not, I always suggest updating your package managers to have the newest database and latest packages available.Lets issue the omf update command and continue on. By now, you’ve probably noticed that OMF will generate an entire set of config files of its own. I believe it’s best practice to use the OMF config files for your aliases, functions, etc. But I stuck with using the basic fish configure directory/files. I guarentee you will have to set several of your $PATH directories to access your programs. If you wish to see those in which are currently set use printf printf "%s\n" $PATH to print out what you have access to executing.
Now lets begin installing plugins
# fish supports atom out of the box, but I also use SublimeText as well
# this enables the sublime command 'subl', if it can be found
omf install sublime

# To enable quick access to your rbenv without doing anything extra
omf install rbenv

# https://github.com/oh-my-fish/plugin-osx
# enables OSx based commands: flushdns, showhidden, trash, updatedb, etc.
omf install osx
You may or may not want to install grc, it is used for highlighting output command for specified commands. But I believe it comes in handy for various commands and makes reading output easier.
brew install grc
omf install grc
# this should automatically load grc to highlight fields rather than having to issue the following command
source /usr/local/etc/grc.bashrc
If you install it, you can verify it’s working properly by issuing a command with assorted output, ie: ps au. You should get a colorized version of something similar to the below table.
USER       PID  %CPU %MEM      VSZ    RSS   TT  STAT STARTED      TIME COMMAND
Tarellel 17590   5.2  0.0  2446204   4976 s005  S+   12:16AM   0:00.04 /usr/bin/python /usr/local/bin/grc -es --colour=auto ps au
Tarellel 14325   1.5  0.0  2500316   5860 s005  S    11:13PM   0:00.73 -fish
root     17591   0.0  0.0  2444720   1172 s005  R+   12:16AM   0:00.00 ps au
Tarellel 15150   0.0  0.0  2492120   5428 s002  S+   11:36PM   0:00.40 -fish
Now back to installing some essential plugins:
# similar to zsh term, allows u to open new tab with current directory
omf install tab

# Add all brew paths to fish $PATH
omf install brew

# used to help enfore 256 color terminal support
# https://github.com/oh-my-fish/plugin-ssh
omf install ssh

# used to make ssh term colors consistent
# https://github.com/oh-my-fish/plugin-ssh
omg install ssh-term-helper
Now if you’re like me, I had several aliases, custom functions, variables and config in my zsh settings. Fish’s function and alias declarations are slightly different than zsh and bash but not to hard to understand. And now would be the perfect time to begin adding them before attempt to do a heck of a lot more. A basic example of variable declarations below, is assigning the $EDITOR variable to use atom.
# -U makes it a univerasal variable
set -U EDITOR atom
Lets make it beautiful
Now you may thing it’s hipster as hell to want custom colors, fonts, and outputs in your terminal. But you want whats comfortable for you, whats easy on the eyes, and is easy to read.
For all I know you may like the default colors and theme that you have setup for your terminal. But you want to spruce it up, I suggest taking a look at the oh-my-zsh theme page, several of them are very similar to their oh-my-zsh counterparts.
Powerline - As you browse through the themes you’ll notice several of the themes require powerline installed in order to fully function. This is a python package and python comes installed by default on most *nix and POSIX operating systems. Depending on your operating system and setup you may want to look at the powerline installation instructions.
pip install --user powerline-status
Now powerline uses HD fonts with special characters for its stylized output, so you’ll need to install various powerline fonts and symbols.
Downloads/Install powerline symbols
You can either install it through the Font-Book app or by moving it to ~/Library/Fonts/
Next lets install all the available powerline fonts, each one looks amazing and adds a whole new experience to your terminal.
git clone https://github.com/powerline/fonts.git
sudo ./fonts/install.sh
Now if you’re using one of those themes that does require powerline and a powerline font. You’ll need to set your terminal applications font to use the powerline fonts. In order to do this in iTerm2 goto the following menus iterm > prefernces > profiles > text and make sure the fonts used are ones with a powerline tag on in. Plain old Courier or Monaco font just won’t cut it.
My setup
oh-my-fish theme: bobthefish
iTerm theme colors: base16-ocean-dark.256
Terminal fonts used
- Regular Font:
14pt Inconsolata for Powerline - Non-ASCII font:
12pt Sauce Code Powerline
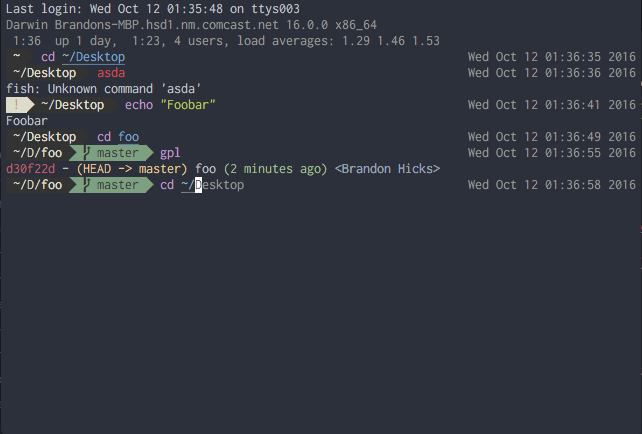
As you can see below, I tend to enjoy using smooth charcoal gray themes, with colors that aren’t to vibrant.
Resources;
- Awesome-fish
- oh-my-fish
- iTerm2 theme colors:
- base16
- dracula
- flattened
- solarized-dark
- smych
- tomorrow theme
- Iterm2-color-schemes (big list of colors)
- iterm2-material-design
- flat-terminal
- lucario
- terminal.sexy : terminal color schemer