Setting up tmux with Rails
Why use tmux?
You may have a similar workflow the way I do. When I’m working on a rails project I tend to have several tabs and/or windows open in the terminal. After a while it tends to be a heaping mess and I end up having to close the terminal down and start all over again. And other times, I have just became tired of having to switch between different tabs and windows, trying to find the one that I need.
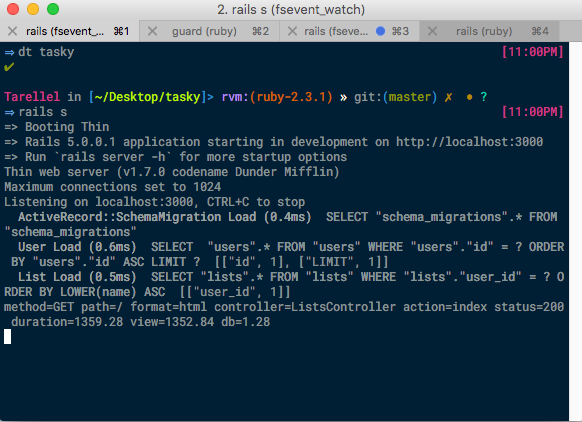
As you can see from the image below, this method works. But having to switch from tab to tab, just to view your output logs or guard builds/tests gets to be a pain after a while.
So what is tmux? It’s a mutliplex and very similar to the *nix screen process. It allows you to perform several processes all within the same screen, without having to switch tabs or windows. And there are tons more applications you can do with than building a rails application, but at the moment it’s a great example of why it makes such a great tool.
I can tell you this much, so far I’ve only used tmux for a short period of time but it has become an essential tool in my development workflow. Tmux’s window and session management makes it very easy to get started and increase my productivity.
Setting up tmux
I’m just going to assume you’re on OSx, with homebrew installed. If you are using Debian, Ubuntu, or some other distro it’s pretty close the same commands. You’ll just be using different package manager commands. Instead of using brew, you will be making the installs with apt-get, pacman, etc.
Lets begin by install tmux
brew install tmux

# allows you to access OSx clipboard (pbcopy & pbpaste) through tmux
brew install reattach-to-user-namespace
Now if this is your first time installing tmux we’ll need to create a .tmux.conf file.
# this will contain colors, settings, key-bindings, etc.
touch ~/.tmux.conf
Now lets install the tux Plugin Manager (yes I know another one).
# make a .tmux directory to store everything
mkdir -p ~/.tmux/plugins

# While we're at it, lets install tmux package manager
git clone https://github.com/tmux-plugins/tpm ~/.tmux/plugins/tpm
The tmux plugin manager, makes it easy to install, update, and remove any and all plugins you may wish to use.
Lets begin by adding our first plugin to tmux, tmux-sensible. You you dive in, it won’t seem like much but it contains various handy default values, bindings, etc. that will make tmux easier to use. The best part of this plugin, is that it’s not supposed to overwrite any config values you may have in you ~/.tmux.conf file. No add the following to very bottom of your ~/.tmux.conf file.
set -g @plugin 'tmux-plugins/tmux-sensible' # recommened tmux defaults
set -g @plugin 'tmux-plugins/tmux-yank' # allows copying to system vie tmux

# Initialize TMUX plugin manager (keep this line at the very bottom of tmux.conf)
run '~/.tmux/plugins/tpm/tpm'
Now is where it gets tricky, with tmux you have a prefix-key combo that you have to use in order issue particular commands. By default the prefix keys are CTRL+b. With some commands/key-combos it makes a difference between b and B or T and t.
Now lets fire up, tmux first the first time. At first it won’t be anything we haven’t seen before. But once you learn the keys and get the right plugins, it’ll be a whole new experience.
# fire up tmux by issuing the following command
tmux
You’ll terminal will flicker for a second and you have a very generic/ASCII based status bar appear at the bottom. This means you’re doing great. Now lets install the tmux plugins by doing the following key combo CTRL+b I. You may have to wait a few minutes, but it’ll install all specified plugins in the bottom of the tmux.conf file.
Now if you want to play around with tmux, to get additional windows, panes, sessions, etc. Great. As you can see from the image, tmux is a multiplexer which means it allows you to have several processes all running within a single terminal screen/tab.
Setup and Install Tmuxinator
Now I’m going to assume you have some version of ruby installed already (various *nix OS’s are coming with it preinstalled). So up next, we will will install tmuxinator, this is ruby gem that makes it a heck of a lot easier to make preconfigured panes and windows with default commands that run when they’re created.
We first need to install tmuxinator and verifiy all the required requirements are met in order to use it.
# install tmuxinator
gem install tmuxinator

# verify everything is ready
tmuxinator doctor
You will now need to add tmuxinator to your shell, for consistency sake I’ll just assume your using zsh/oh-my-zsh. You will need to add source ~/.bin/tmuxinator.zsh to your .zshrc file.
Now you’ll be thinking, but no file by the name ~/.bin/tmuxinator.zsh even exists. What gives? Well lets download the required completion file and get started. And if you’re not using zsh, there’s files for bash and fish as well.
# Download zsh completion file
curl -O https://raw.githubusercontent.com/tmuxinator/tmuxinator/master/completion/tmuxinator.zsh
mkdir ~/.bin
mv tmuxinator.zsh ~/.bin/
Now in order to make sure everything is loaded and configured, reload the current terminal.
Lets create a tmuxinator project
Tmuxinator projects let us setup a predefined layout, with panes performing specific tasks. Rather than mess around and build a layout every time we want to open up tmux.
To create a tmuxinator project, lets issue the following command:
tmuxinator new [project_name]

# for example
tmuxinator new red_willow
This will generate a project.yml file in the ~/.tmuxinator folder. It should also open up your specified $EDITOR allowing you to get a rough idea on what tmuxinator’s configuration looks. It’s very basic theres panes, windows, even layouts, the root: ~/[project_name] at the top is the folder you specify for tmuxinator to open up all the tmux terminals to.
Below is an example of a pretty basic rails based tmux session, built with tmuxinator.
# ~/.tmuxinator/tasky.yml
name: tasky
root: ~/Desktop/red_willow

windows:
  - main:
      # http://stackoverflow.com/questions/9812000/specify-pane-percentage-in-tmuxinator-project
      # use: tmux list-windows to get coords and window sizes
      layout: b147,208x73,0,0[208x62,0,0,208x10,0,63{104x10,0,63,103x10,105,63}]
      panes:
        - rails server thin
        - guard
        - atom .
        - sleep 7 && rails -t
        - rails c
        # - foreman start
  - logs: tail -f log/development.log
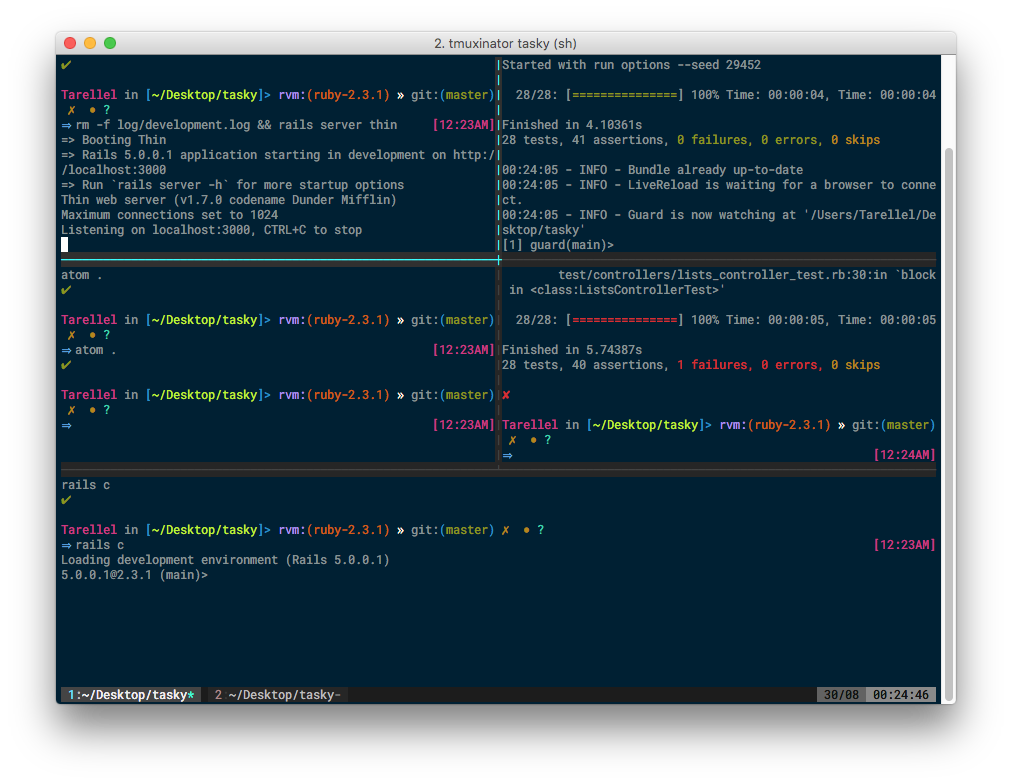
Now issue the following command to initiate the tmux session tmuxinator [project_name] From here it may take a few seconds for everything to load up and start running. You should now have terminal session similar to the image below. Your sessions colors, panes, and windows may be a bit different from what it looks like. That’s because you will need to setup your tmux config and trust me figuring out all the settings to use can be a major beast to deal with. So to make things a little easier and somewhere to start from, here’s a copy of my current tmux.conf. And if your lazy, you can always search github for .dotfile repositories because there are tons and tons of tmux.conf files listed.
How it’s time to let you loose on your own and see what kind of project configure best suites your needs.
tmux commands/shortcuts
Your prefix key can be configured in ~/.tmux.conf, but I’ve chose to leave it as CTRL+b, because it means there’s no way I will accidentally close or move between a window, pane, session, etc. And this is just a small batch of commands you can do, tmux is a massive program with tons of features I haven’t even begin to think about.
#All of these require you to first initiate the prefix key combo:
# Default Prefix: CTRL+B and than whatever you want it to do

" - Horizontal split
% - Vertical split
<arrow buttom> - moves between session panes
z - loads window focus to current tmux panel
c - load up new tmux window
<window number> - switches between specified window
d - detach current tmux session
x - kill current pane in focus
[space] - toggle between layouts
And here a few essential tmux console commands:
# to view list of current tmux sessions
tmux ls

# to reattach tmux panels (number specified will be specified tmux session from tmux ls)
tmux attach -t 0

#To kill specific tmux session
tmux kill-session -t 0

# kills the last tmux session on the list
tmux kill-session

# to completely kill tmux
tmux kill-server